Linko’s Incidents module offers Industrial Pretreatment departments tools to record and manage reported spills, odors and other events related to wastewater. Authorities can track the location and origins of these reported issues in an area of the software separate from the existing LinkoCTS, LinkoFOG, LinkoHW and LinkoAG applications.
** If you have the Remote Inspector module, upon special setup plus creation of a Remote Inspector Incidents form, Incidents records can be synced from LinkoCTS to Remote Inspector so your Inspectors can complete an Incidents inspection in the field. This RI Incidents inspection plus photo attachments will be synchronized back to your LinkoCTS to the Incidents record in your Incidents module.
Here’s an example
of a potential business process using the Incidents module:
1. Designated personnel receive a notification (phone or email) from a concerned citizen or a referral agency regarding a spill, foul odor, illegal dumping, etc.
2. This event is documented by entering the details into Linko’s Incidents module and assigning to an Inspector
3. Inspector determines initial response action – either unannounced or scheduled inspection
4. Inspector fills out and submits the Remote Inspector Incidents form while at reported location
a. Using Remote Inspector, the Inspector can also take photos and attach them to the Incidents Inspection form while at the reported incident site.
5. This filled out Incidents form plus photo attachments are synchronized from Remote Inspector and attached to the Incidents record in Linko’s Incidents module
6. Based on the Incidents report, a review and decision of next course of action can take place
To create a new
Incidents record:
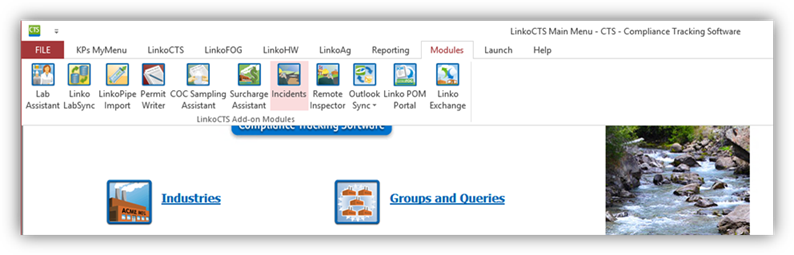
1. Go to your Incidents module by clicking Modules from your Linko ribbon bar, then click the Incidents icon
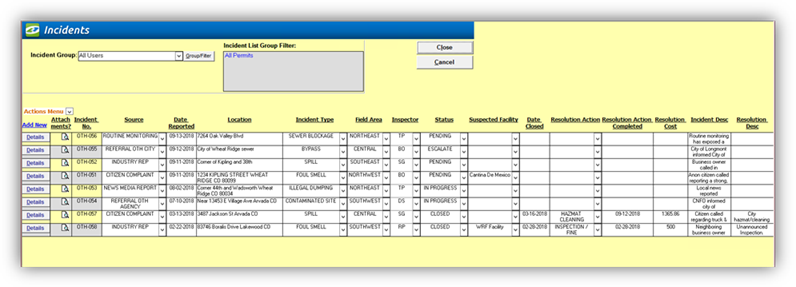
2. From the main Incidents screen, click the blue Add New link that’s on the left of the screen.
3. The system will populate the next sequential Incident Number. You must complete all items marked in red.
a. Location: Populate the Location field with the physical address or cross-street reported
b. Source: Populate the Source field with who reported the incident. Note that this field is referred to as a Self-lookup. This means you can type whatever you want in this field. The system creates a dropdown list containing everything entered.
c. Date Reported: Populate the date you received this reported incident.
d. Incident Type: Populate the type of incident being reported. Note this is a Self-lookup field.
e. Status: Populate the current status of this reported incident. Note this is a Self-lookup field.
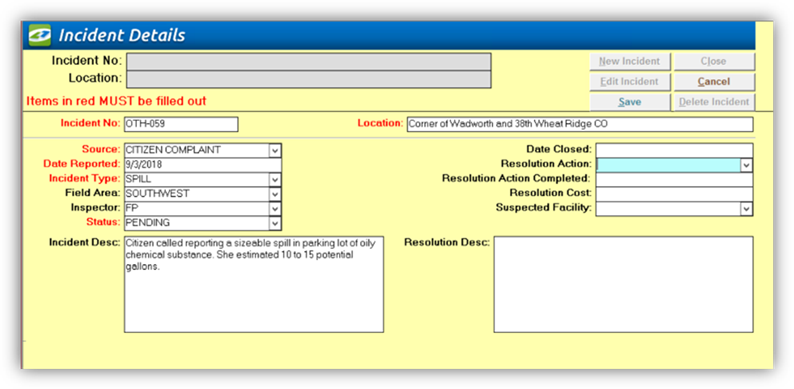
4. Other non-required fields may be populated as needed:
a. Field Area: Populate with city/district location indicators to help Inspectors. Note this is a Self-lookup field.
b. Inspector: Assign this reported incident to one of your Inspectors.
c. Incident Desc: Populate this text box with a detailed description of the reported incident.
5. Click the Save button on the upper right of screen.
Completing an
Incident record:
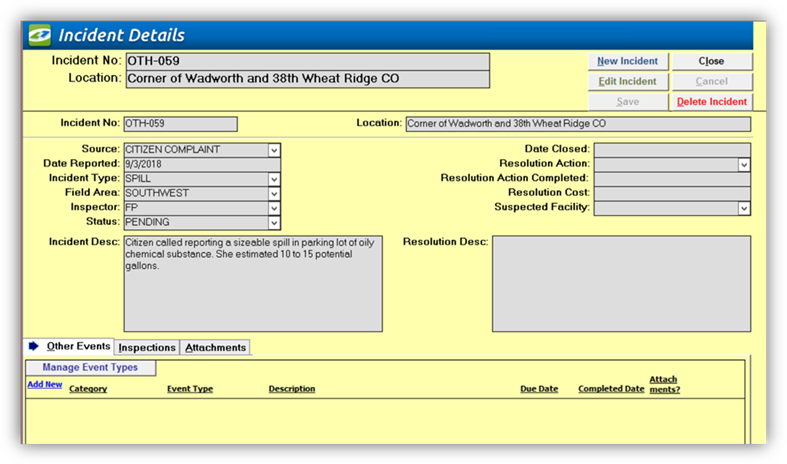
1. Once a new Incident record is created and saved, three tabs appear at the bottom of the screen:
a. Other Events: Clicking the blue Add New link in upper left in the Other Events tab, you can add an event for such things as letter printed, phone call, or any other Event Types you would like to create. Note you must populate the red fields to save an event – Event Type and Due Date. Click the Save button when complete.
b. Inspections: Clicking the blue Add New link in upper left of the Inspections tab, you can add an Inspection manually.
i. If you have the Remote Inspector module that has been setup to utilize Incidents module, an Inspection can be completed via Remote Inspector out in the field. That record will be synchronized back to the Incident record within the Incidents module in LinkoCTS. Note you must populate the red fields to save an inspection – Event Type and Due Date.
c. Attachments: Clicking the Attach New File button in upper left of the Attachments tab, you can add digital files to the Incident record such as photos, documents, pdf, etc.
2. Based on the incident, you may add as many Events and Inspections as necessary to move the incident to completion.
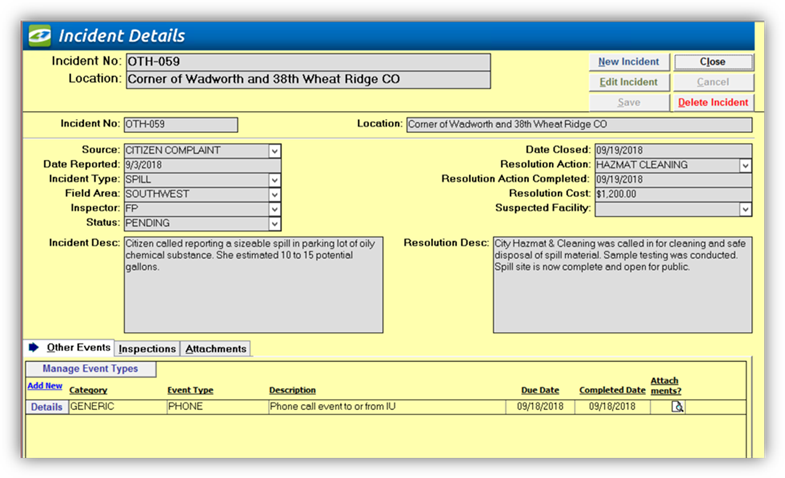
3. To Close and Resolve the incident, click the Edit Incident button in upper left of screen.
a. Date Closed: Enter the date you’re closing the Incident record.
b. Resolution Action: Enter the action taken to resolve the incident. Note this is a Self-lookup field.
c. Resolution Action Complete: Enter the date the resolution action was completed.
d. Resolution Cost: Enter the cost accrued to resolve the incident.
e. Suspected Facility: If a facility is suspected regarding the incident, choose the Facility from the Suspected Facility dropdown field.
f. Resolution Description: Enter a detailed description of the incident resolution that was taken.
g. Click the Save button on upper left of screen to save these changes.