Local Limit Classes provide greater flexibility for the POTW to manage the Parameter local limits that apply to Industrial Users. Local Limit classes allow you to create multiple sets of local limits. You can create one class of Local Limits that apply to all Industries or you can create multiple classes of Local Limits and assign Industries to a particular class.
If you need to assign the same Local Limits to all of your Industries:
1. Create a Local Limit Class.
2. Assign the Parameters, Limits, and Date Effective to the Local Limit Class.
3. Assign the Industries to the Class.
If you need to assign different Local Limits to different Industries: Examples might be where different Industries discharge to different WWTP’s with different local limits in effect or industries are assigned local limits based on their flows.
1. Create a Local Limit Class for each of your WWTPs.
2. Assign the Parameters, Limits, and Date Effective to the Local Limit Class for each WWTP.
3. Assign the Industries to the appropriate Limit Class for the WWTP they discharge to.
If you have another specialized need to meet for your Local Limits grouping: Examples might be where the Local Limits in effect are determined by river flows the WWTP is discharging to.
1. Create a Local Limit Class for each your groupings; e.g. a Local Limit Class for different flow volumes in the receiving waters.
2. Assign Parameters, Limits, and Date Effective to each of the Local Limit Classes.
3. Assign the Industries to the appropriate Limit Class.
a. You can associate industries with a Limit Class by copying in a group of industries with a different date effective.
If you need to assign the same Parameters to a number of Local Limit Classes:
1. Assign the Parameters you need to one of the Local Limit Classes.
2. Copy the group of Parameters from the first Local Limit Class into the second one.
Local Limit Classes Summary
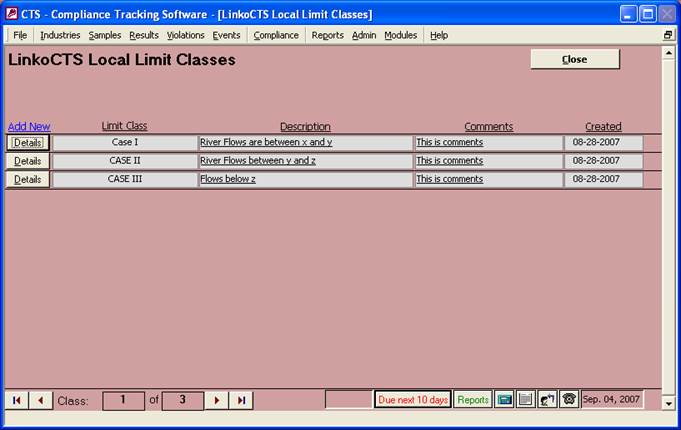
View a summary of the Local Limit Classes.
(This list view is no longer available in Version 13.3. Access the Limit Classes from the “View Local Limits” control under the Monitoring Points tab in Industries.)
|
Using Local Limit Classes |
|
|
Viewing a list of all the Local Limit Classes. |
From the Main Menu screen, select the Compliance item from the Menu Bar, and then select Local Limits. This opens the Local Limit Classes screen displaying the Limit Classes. |
|
Viewing the Local Limits for a specified industry. |
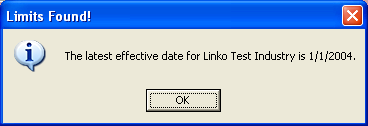
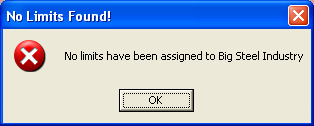
From Industry Management choose an Industry of interest. Select the Monitoring Points Tab and click on the View Local Limits Button. This opens the Local Limit Class Details screen while showing one of two Indicator messages about that Industry and any related Local Limits. If that Industry has been assigned to one or more Local Limit Classes, the Indicator message displays the latest Local Limit Effective Date for that Industry.
Linko opens to the Local Limit Class Details Screen with the Limit Class that has the most recent effective date for that Industry. If there are no Local Limits for that industry a different message indicates this.
|
|
Local Limit Classes Reporting |
The following system
reports are available for Local Limit Classes: 1. Industries
not assigned local limits 2. Local
Limit Classes and Assigned Industries (All): 3. Local
Limit Classes and Limits (All): |
|
Local Limits and Monitoring Points |
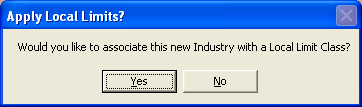
When a Monitoring Point
is created for an Industry that does not have a Mon Point already, the software
will check to see if that Industry has been associated with a Local Limit
class yet. If the IU is not part of
any Limit Class, the user is prompted to associate the Industry with a Limit
Class.
If you say YES, the user
will be prompted to select the Details of the Limit Class that you wish to
add the Industry to. Then choose “Industries in this Class” and add the
Industry with the Monitoring Point just created. Cancel to exit the
Industry Input line, and then Close to exit the Local Class Details and
return to the Monitoring Point. |
|
Buttons |
Action performed |
|
Close |
Exit the Local Limit Classes screen and returns to the
Main Menu. |
|
Details |
Opens the Local Limits
Class Details Screen displaying the Limit Class Information for that
Limit Class. User can then add / edit / delete parameter limits and
industries for that class. |
|
Item |
Description |
|
Add New |
Opens the New Local Limits
Class Details screen in Edit Mode to create a new Limit Class. User can
then assign parameter limits and industries to that new class. |
|
Limit Class |
The name of the Limit Class. |
|
Description |
A description of the Limit Class purpose / function. |
|
Comments |
Comments that you can add about the class. |
|
Created |
The date that the class was created. |
View and modify the Limit Class Information, and the Limits and Industries in a Limit Class.
|
|
|
|
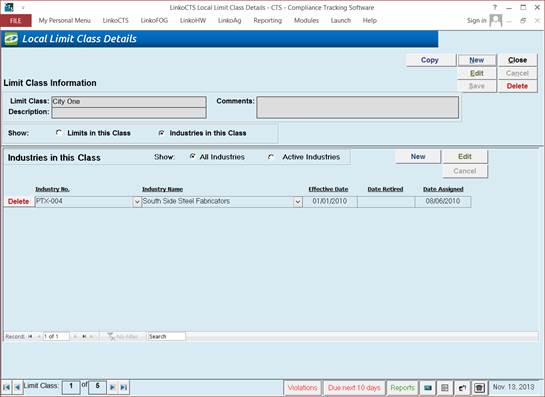
Adding an Industry to a Local Limit Class |
From the Local Limits Class Details screen for
the Limit Class, to add an Industry to a Local Limit Class, the “Show
Industries in this Class” must be selected. Click on the NEW button in the “Industries in this Class” section to open a data entry line where a new Industry can be selected by using either the Industry No. or Industry Name from the Pull-Down list. Enter the Date Effective to indicate when the Limit Class should be in force for the Industry. Linko Automatically enters the Date Assigned as the day that the new Industry was entered. The newly associated Industry is automatically saved when you move to a new line or exit the screen. |
|
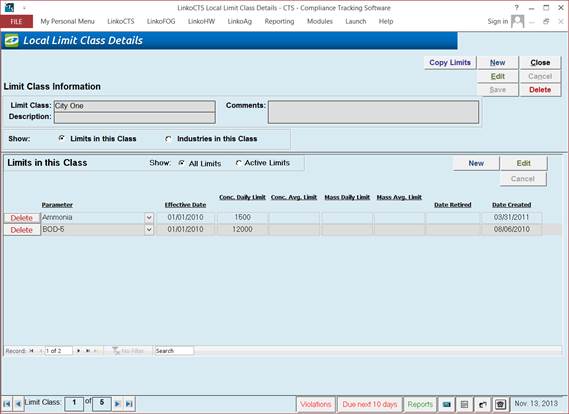
Adding a Parameter to a Local Limit Class |
From the Local Limits Class Details screen for
the Limit Class, to add a Parameter to a Local Limit Class, the “Show Limits
in this Class” must be selected. Click on the NEW button in the “Limits in this Class” section, to open a data entry line where a new Parameter can be selected from the Pull-Down list. Enter all the appropriate Limit information for the Parameter. Enter the Date Effective to indicate when the Parameter should be in force for the Limit Class. Linko Automatically enters the Date Created as the day that the Parameter was entered. The newly added Parameter Limit is automatically saved when you move to a new line or exit the screen. |
|
Buttons |
Action performed |
|
Copy Industries
/ Copy Limits |
The button shows “Copy Industries” when “Show Industries in this class” is selected. Clicking the button opens the Associate Industries with a Limit Class window allowing the user to copy all the Industries from another Limit Class to the current Limit Class being edited, or to assign the Industries from an Industry Group to the current Limit Class. This screen also allows the user to assign a date that the Limit Class assignment goes into effect for the Industries copied / assigned. The button shows “Copy Limits” when “Show Limits in this
Class” is selected. Clicking the button opens the Copy Limits to a Limit Class window
allowing the user to copy the Limits in use in another Limit Class into the
current Limit Class being edited, and to assign a date that the Limits go
into effect. |
|
New |
Clears values and allows
you to create a new Local Limit Class.
While editing, the New, Edit, Close, Delete and Record Selector
buttons will be disabled. This button only affects the “Limit Class Information” section of the Details screen. The “Industries / Limits in this Class” section of the screen will not be accessible until after you have created and saved the New Limit Class. |
|
Edit |
Allows you to edit the
displayed Local Limit Class information.
While editing, the New, Edit, Close, Delete and Record Selector
buttons will be disabled. This button only affects the “Limit Class Information” section of the Details screen. The “Industries / Limits in this Class” section of the screen will not be accessible until after you have saved your Editing changes. |
|
Save |
Saves the changes made to the Local Limit Class information. |
|
Close |
Close and exit. |
|
Cancel |
Cancels any changes made to the Local Limit Class during Editing. |
|
Delete |
Deletes the Local Limit Class and the associated Limits and Industries. |
|
Record Selectors |
In a typical screen
display, Linko will have two Record selectors available at the Local Limit
Class Details Screen. The selector identified
as “Record:” allows you to move between the displayed Industries or between
the displayed Limits in the Limit Class, depending upon whether Limits or
Industries are selected to be displayed. The selector identified as “Limit Class” allows you to move from one Limit Class to another quickly while displaying the Details for each of the different Local Limit classes. |
|
Status Bar |
Status Bar allowing you to view Events Due and Not Complete, Reports for Local Limits, a Calendar, a Calculator, Contact Information, or create a new Phone Log Event |
|
Limit Class
Information |
Description: |
|
Limit Class |
The name of the Limit Class. |
|
Description |
A description of the Limit Class purpose / function. |
|
Comments |
Comments that you can add about the class. |
|
Limit Class Selector |
|
|
Show Limits in this Class or |
Selecting “Show Limits in this Class” changes the Details available for the Limit Class screen and lists the Parameter Limits assigned to the Limit Class. |
|
Industries in this Class |
Show “Industries in this Class” changes the Details available for the Limit Class screen and lists the Industries in the Class. |
|
|
|
|
|
When Viewing “Industries in this Class” the
following items are available: |
|
Industry Selector: Show
All Industries or Active Industries |
Selecting All Industries lists all Industries ever associated with this Limit Class and their effective and retired dates. Selecting Active Industries lists the Industries that are currently in effect for this Limit Class. Retired Industries are not displayed. |
|
Buttons: |
Action Performed: |
|
New |
Opens a new data entry
line in order to enter the Industry No., the Industry Name, and the Effective
Date of an Industry that you want to associate to the Local Limit Class.
Linko will automatically add the DATE ASSIGNED to the Industry and will use
the date the User entered the info. All the Industries in
Industry Management are available in the Pull-Down, and you may choose an
Industry either by the NO. or by the Name and Linko will fill in the other. |
|
Edit |
Allows you to edit the
displayed Industries. While editing,
the New button will not be available and you must hit Cancel to exit out of
the Edit mode. Changes will be saved as
soon as you tab out of the edited field. |
|
Cancel |
Use the Cancel button to leave the Edit mode. You must hit Cancel to end editing, however changes will be saved as soon as you tab out of the edited field. |
|
Remove |
Removes the selected Industry from the Local Limit Class group. The user will be asked for confirmation of the removal. Linko recommends that you never REMOVE an Industry from a Local Limit Class that has had historical use due to the loss of associated data that occurs. Removing an Industry will cause any limits associated with Samples taken for that Industry to be lost. ONLY USE Remove when you are adding Industries and you notice some mistake, for example you accidentally added an Industry twice. |
|
Fields |
Description |
|
Industry NO. |
Drop down box offering a
list of Industries by Industry. |
|
Industry Name |
Drop down box offering a
list of Industries by Name. |
|
Effective Date |
Enter the Date that the Limit Class should go into effect for that Industry. Sample Dates are compared to the limit effective dates for the sake of determining what limit applies to that given sample. |
|
Date Retired |
Use this field to track the end date when a Local Limit Class was no longer in effect on an Industry. Limits that have been retired are not compared to samples taken on or after the retire date for the sake of calculating compliance. |
|
Date Assigned |
Linko automatically assigns this field with the date that the Industry was assigned to the Local Limit Class by the User. |
Shows the Local Limit Class Details with the “Limits in this Class” selected; shows a list of all Parameter limits that are in effect for the selected Limit Class.
|
Entering New Limits |
Click on New to open a
new data entry line in order to enter the Parameter, the Date Effective, and
all the Limit information. Linko will automatically add the DATE CREATED to
the Parameter and will use the date the User entered the info. The Parameters entered in under a Limit Class have no units displayed.
The units are assumed to be what are assigned in the Parameters Listing in
the Parameters section of Sample and Results
Administration. While editing, the New
button will not be available and you must hit Cancel to exit out of the Edit
mode. Changes will be saved as soon as you tab out of the edited
field. |
|
Items: |
When Viewing “Limits
in this Class” the following items are available: |
|
Limit Selector: Show All Limits or Active Limits |
Selecting All Limits
shows all limits ever in effect for the selected Limit Class regardless of
effective date or retired date. Selecting Active Limits lists the Limits that are
currently in effect. Limits that retired are not displayed. Limits that have
been replaced by new limits with new effective dates are not displayed. |
|
Buttons |
Action Performed: |
|
New |
Opens a new data entry
line in order to enter the Parameter, the Date Effective, and all the Limit
information. Linko will automatically add the DATE CREATED to the Parameter
and will use the date the User entered the info. Select the Parameter from
the dropdown listing or type in the first letters and Linko will jump to it. The parameters available
come from the Samples and Results Administration’s
Parameters tab. |
|
Edit |
Allows you to edit the
displayed Parameters. While editing,
the New button will not be available and you must hit Cancel to exit out of
the Edit mode. Changes will be saved as
soon as you tab out of the edited field. |
|
Cancel |
Use the Cancel button to leave the Edit mode. You must hit
Cancel to end editing, however changes will be saved as soon as you tab out
of the edited field. |
|
Delete |
Removes the selected Parameter from the Local Limit Class group. The user will be asked for confirmation of the removal. Linko recommends that you never REMOVE a Parameter from a Local Limit Class that has had historical use due to the loss of associated data that occurs. Removing a Parameter will cause any limits associated with Samples taken for that parameter to be lost. ONLY USE Delete when you are adding Parameters and
you notice some mistake, for example you accidentally added a Parameter
twice. |
|
Fields |
Description |
|
Parameter |
The pollutant parameter
name |
|
Effective Date |
The date these limits
became effective. Sample Dates are compared to the limit effective dates for
the sake of determining what limit applies to that given sample. |
|
Conc. Daily
Limit |
The concentration daily limit for this parameter |
|
Conc. Avg.
Limit |
The concentration average limit for this parameter |
|
Mass Daily
Limit |
The mass daily limit for this parameter |
|
Mass Avg. Limit |
The mass average limit for this parameter |
|
Date Retired |
The date that the limit is no longer in effect. Limits that have been retired are not compared to samples taken on or after the retire date for the sake of calculating compliance. |
|
Date Created |
The date that the
parameter was added to the Local Limit Class. Linko automatically fills in
the date here with the date the user added the parameter. |
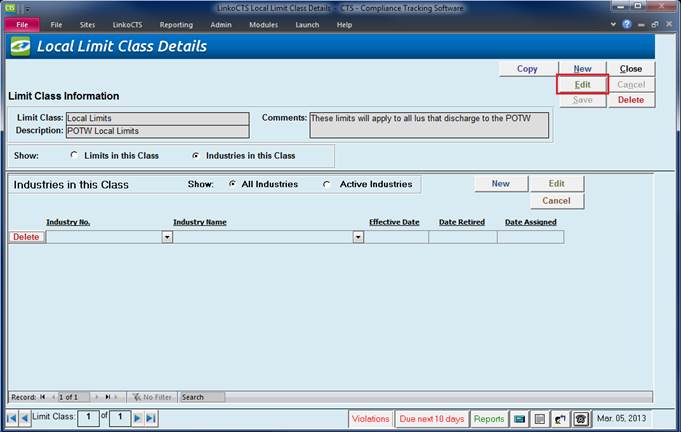
Complete the information for a new Limit Class by selecting Edit at the top.
|
Create a new Local Limit Class |
From Industry Management 1. Click on Monitoring Points Tab 2. Click on View Local Limits 3. From the Local Limit Class Details screen, click on the NEW button. 4. Enter Limit Class Information on the New Local Limit Class screen. 5. Save your New Local Limit Class. |
|
|
From the Local Limits Classes Screen: 1. Enter the Local Limits Classes Screen from the Menu Bar, Compliance Item, Local Limits. 2. Click on Add New. 3. Enter Limit Class Information on the New Local Limit Class screen. 4. Save your New Local Limit Class. |
|
Buttons |
Action performed |
|
Save |
Saves the changes made to the Local Limit Class information. |
|
Cancel |
Close and exit without saving. |
|
Item |
Description |
|
Limit Class |
The name of the Limit Class. |
|
Description |
A description of the Limit Class purpose / function. |
|
Comments |
Comments that you can add about the class. |
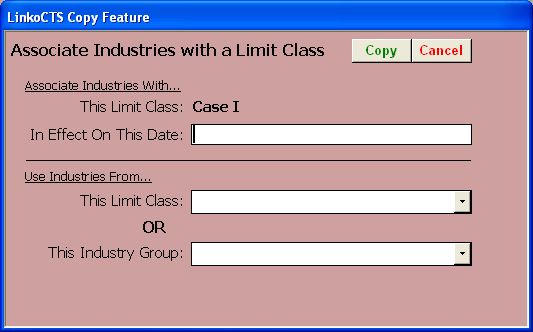
Copy Industries from another Limit Class or an Industry Group into a new Limit Class. The user can also associate Industries from an existing Limit Class to the same Limit Class but assign new effective dates for the Industries.
|
Copy |
Applies the selections you make. |
|
Cancel |
Exit without copying the Industries. |
|
This Limit Class |
Identifies the
Limit Class that you are adding to. |
|
In Effect on this
Date |
Enter the date
that the Limit Class should be effective for the assigned Industries. |
|
Use Industries
from This Limit Class |
Select one of the other Limit Classes to copy all the
Industries from that Limit Class to this one. |
|
Use Industries
from this Industry Group |
Select one of the Industry Groups available in Linko or created by the User to copy the Industries from. |
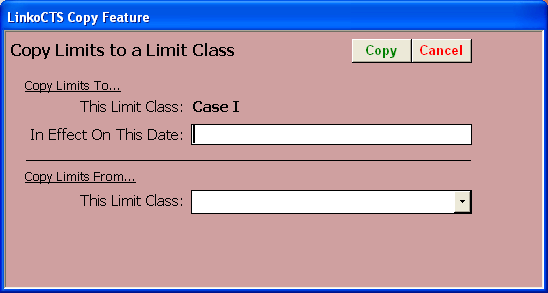
Copy Parameter Limits from an existing Limit Class to a new Limit Class and assign new effective dates.
|
Copy |
Applies the selections you make. |
|
Cancel |
Exit without copying the Limits. |
|
Copy Limits To... This
Limit Class |
Identifies the
Limit Class that you are adding to. |
|
In Effect on this Date |
Enter the date
that the Parameters are in effect for the Limit Class. |
|
Copy Limits
From This Limit Class |
Select one of the other Limit Classes to copy all the Parameters from that Limit Class to this one. All limits in effect for the class selected here are copied into the Limit Class above. The user is prompted for a new effective date. The user can then edit the copied limits as needed. |